The Animation Process: 10 Steps to Create an Animated Video

Co-founder of Yum Yum Videos | Explainer Video & Video Marketing Expert
The animation process is the sequence of stages used to turn an idea into a finished animated video. In a professional production, that usually means moving through research, scriptwriting, storyboarding, art direction, voiceover, illustration, animation, sound design, integration, and final delivery.
At Yum Yum Videos, we have used this type of animation production process for more than a decade across explainer videos, product videos, training content, and other animated projects. The exact workflow changes with the style and scope of the piece, but the logic stays fairly consistent: define the message first, approve the visual direction before animation begins, and leave the most expensive production work until the earlier decisions are settled.
This guide explains the animation steps one by one, along with the larger stages of animation they belong to and what usually happens at each point.
Table of Contents
What Are the Main Steps in the Animation Process?
A typical animated video production process includes these 10 steps:
- Research
- Script
- Storyboard
- Art direction
- Voiceover
- Illustration
- Animation
- Sound design
- Integration and post-production
- Final delivery
Studios may combine or rename some of these animation phases, but most professional workflows cover the same core decisions.
If you are trying to understand how to make an animation from beginning to end, this is the practical sequence to follow.
The 3 Main Stages of Animation
The 10 animation steps can also be grouped into three broader stages.
Pre-Production
Pre-production is where the project is planned.
It includes research, scriptwriting, storyboarding, art direction, and the early decisions around voiceover and visual style. The goal is to settle the message and production plan before the team starts creating all of the final assets.
Production
Production is where the visual material is created.
For a 2D animated video, this usually includes illustration, asset preparation, rigging, keyframes, inbetweening, and the animation itself.
Post-Production
Post-production brings the finished pieces together.
This stage usually includes sound editing, music, synchronization, rendering, color adjustments, final effects, exports, and delivery.
This three-stage view is useful when people talk about the stages of animation, while the 10-step model gives a more detailed look at the actual animation production workflow.
A Short History of the Animation Production Process
Before digital animation tools became standard, animators created films frame by frame by hand.
Traditional cel animation involved drawing individual frames on transparent sheets called cels, photographing them in sequence, and playing the images back quickly enough to create the illusion of movement.
That process demanded a large amount of manual work. Digital 2D and 3D tools changed the production workflow by making it easier to edit artwork, reuse assets, rig characters, interpolate movement, and render finished scenes.
The basic planning principles still remain. A modern animation production process may use very different software, but it still depends on making decisions about story, composition, timing, movement, and sound in the right order.
The Animation Process Step by Step
1. Research: Understanding the Brand and the Goal
The first animation step happens before anyone starts drawing.
The production team needs to understand the company, product, audience, message, and purpose of the video. At Yum Yum Videos, we usually begin with a creative brief that covers the brand’s identity, target audience, goals, tone, and the information the video needs to communicate.
You can also see a downloadable version of our creative brief.
That research affects almost every later decision.
A video aimed at a technical buyer may need a very different script and visual language from a social ad aimed at first-time customers. The same applies to a training video, product demo, or healthcare explainer.
A short kickoff meeting can also surface details that are difficult to capture in a written brief.
By the end of this stage, the team should know what the video needs to accomplish and who it needs to speak to.
2. Script: Defining the Message
The script gives the animation process its narrative structure.
It establishes the core message, the order of information, the voiceover, and the basic rhythm of the piece.
A weak script creates problems later because every visual stage is built around it. If a sentence is unclear, too long, or trying to communicate several ideas at once, the storyboard and animation have to compensate for that problem.
For most animated explainer videos, I prefer to settle the script before the team invests heavily in illustration or animation.
A good script should answer three basic questions:
- What does the audience need to understand?
- What should they remember after the video ends?
- What should they do next?
You can see the writing stage in more detail in our guide to the explainer video script.
3. Storyboard: Turning the Script Into Scenes
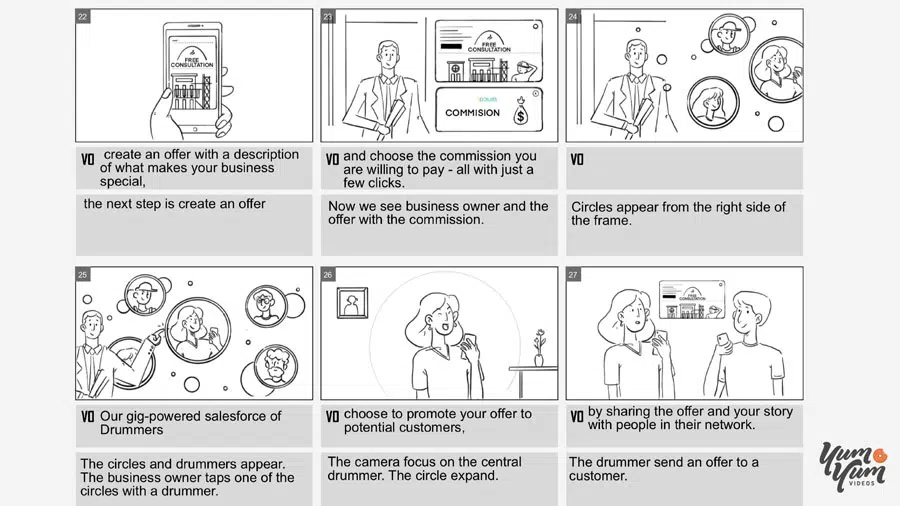
The storyboard is the visual plan for the video.
Each panel shows what the viewer will see during a specific part of the script. It can include character actions, framing, transitions, camera movement, on-screen text, and notes for the production team.
This step connects writing and visual production.
At Yum Yum Videos, the storyboard gives both the client and the production team a chance to review the sequence before the project moves into final illustration and animation.
That matters because changing a storyboard panel is relatively simple. Rebuilding a finished animated scene can require new artwork, new animation, and another round of editing.
For a deeper look at this stage, see our guide to creating an explainer video storyboard.
4. Art Direction: Defining the Visual Style
Once the structure is clear, the art direction stage defines how the final video should look.
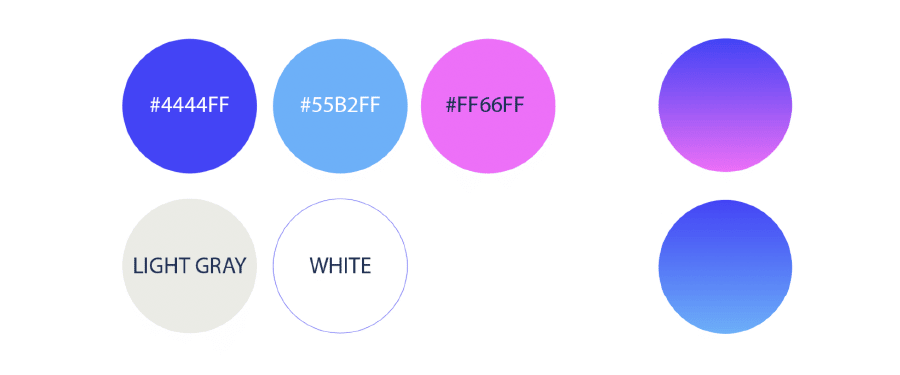
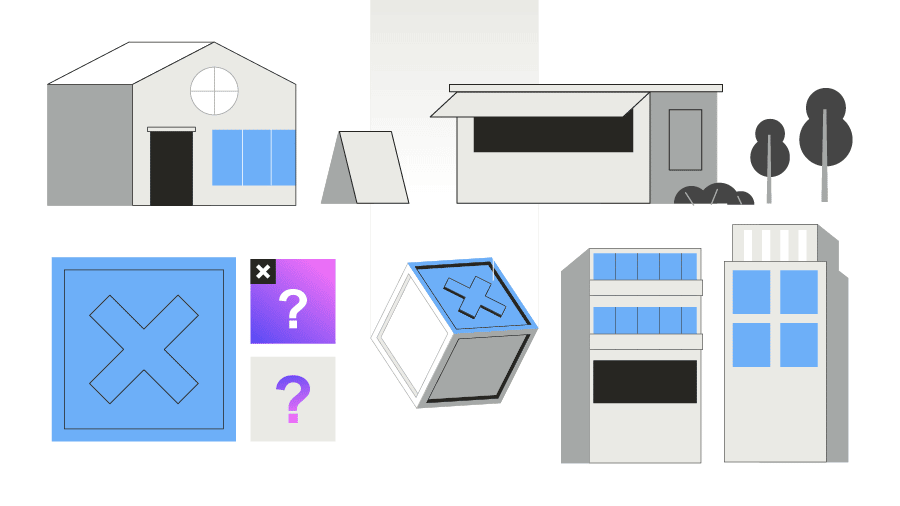
For a custom 2D project, this often involves style frames that establish the visual treatment for characters, environments, products, typography, shapes, and color.
At Yum Yum Videos, we typically use a small group of representative frames so the client can evaluate the visual direction before the full illustration stage begins.
A useful style frame does more than look attractive. It answers practical production questions:
- How detailed will the characters be?
- How will the brand colors appear?
- What type of backgrounds will the video use?
- How much texture or shading is needed?
- How should interfaces, products, or data be represented?
Once those choices are approved, the rest of the visual team has a clear reference.
5. Voiceover: Recording the Narration
If the animation uses narration, the voiceover is usually recorded before final animation.
The reason is timing.
Animators need to know how long each line takes so they can synchronize character actions, transitions, text, and scene changes with the narration.
The voice also affects how the piece feels. Pace, tone, accent, energy, and delivery can make the same script sound very different.
For client work, we usually present several professional voiceover options that fit the brand and project, then record the approved script once the narrator is selected.
6. Illustration: Creating the Final Assets
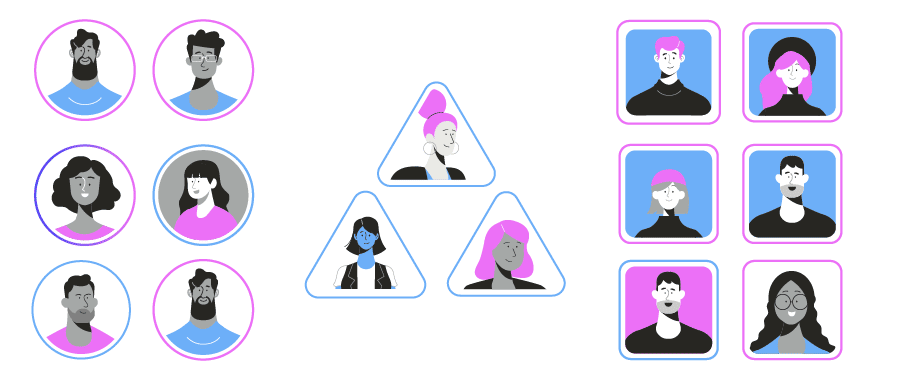
The illustration stage turns approved style frames and storyboard compositions into the assets the animators will use.
Depending on the project, that can include:
- Characters
- Backgrounds
- Props
- Products
- Icons
- Interface elements
- Charts
- Text treatments
Digital illustration is usually built in layers so individual parts can be moved independently later.
For example, a character’s head, torso, arms, hands, and facial elements may all be separated. That gives the animator much more control during rigging and motion.
The exact file format depends on the workflow, but layered formats such as PSD or AI are common when assets need to stay editable.
7. Animation: Bringing the Artwork to Life
Animation is the stage most people think of when they hear “how to animate,” but it comes after a large amount of planning and asset creation.
The animator imports the artwork, prepares the elements for movement, and starts building the scene.
For character animation, that may involve rigging. A rig gives the character a digital structure that controls how different parts move.
Animators then create keyframes for important poses or positions.
The motion between those keyframes is built through inbetweening or interpolation, depending on the technique and software.
Timing matters as much as movement.
A transition that lasts half a second too long can make a scene feel slow. A character action that happens too quickly can become difficult to read. Animators constantly adjust spacing, easing, timing, and overlap to make the motion feel intentional.
Once the scene is working, the team reviews it for visual errors, timing problems, and inconsistencies before moving on.
8. Sound Design: Building the Audio Layer
The visual animation may be finished, but the video still needs an audio environment.
Sound design can include:
- Voiceover editing
- Music
- Sound effects
- Transitions
- Interface sounds
- Ambient audio
The team synchronizes these elements with the visuals so the sound supports what is happening on screen.
In a simple explainer video, the audio layer may be subtle. A commercial or character-driven piece may use sound much more actively to reinforce timing, humor, emotion, or impact.
9. Integration and Post-Production: Putting Everything Together
Integration is where the individual production elements become a finished video.
The team combines the animation, voiceover, music, and sound effects, then prepares the final sequence for rendering.
Rendering converts the project into a video file with the required resolution, frame rate, aspect ratio, and format.
Post-production may also include final color adjustments, compositing, visual effects, transitions, or cleanup.
This stage can take longer on complex productions because higher resolutions, heavier effects, and more detailed scenes require more processing time.
A Real Animation Production Example: Accelerant
Some of the artwork and animated examples used in this guide come from a series we produced for Accelerant.
The project required us to explain an insurance platform and business model through a consistent visual system across several videos.
That meant the earlier animation steps mattered a lot. The script, storyboard, visual language, and reusable assets needed to work together across the series rather than only inside one isolated video.
Accelerant later reached major funding and IPO milestones. Those business results belong to the company’s broader trajectory, not to the animation itself. The case is useful here because it shows how a structured animation production process can support a long-running video series with consistent messaging and visuals.
10. Final Delivery: Review and Export
The final animation step is delivery.
Before the project closes, the client reviews the finished video and the team handles any agreed revisions.
The final files are then exported for the intended channels. A website video, YouTube upload, social ad, presentation, and trade-show screen may all require different aspect ratios, file sizes, or resolutions.
For a typical custom animated explainer video, the full process often takes several weeks because each stage depends on decisions made earlier.
At Yum Yum Videos, a standard production usually runs around six to eight weeks, depending on complexity and feedback.
How Long Does the Animation Process Take?
There is no single production time that fits every animation project.
A simple motion graphics piece may move quickly. A character-heavy 2D video, detailed 3D animation, or long training series can require substantially more time.
For a professional custom animated video, the schedule usually depends on:
- Video length
- Animation style
- Number of characters and scenes
- Illustration complexity
- Voiceover requirements
- Number of review rounds
- Speed of client feedback
- Final formats and deliverables
The animation stage itself is only part of the schedule. Script, storyboard, art direction, illustration, sound, rendering, and review all add time.
This is why “how long does it take to animate one minute?” and “how long does the full animation production process take?” are two different questions.
How Much Does Animation Production Cost?
Animation cost varies widely by style, length, team, level of customization, and production complexity.
Template-based or freelancer work can cost relatively little, while custom studio animation can require a much larger budget.
For current pricing ranges and production tiers, see our guide to animation cost per minute.
The production process also affects the budget.
Projects become more expensive when they require more detailed illustration, additional characters, 3D work, complex motion, multiple formats, or accelerated delivery.
Types of Animation and How the Process Changes
The animation process described above is based mainly on custom 2D production, but the same planning logic applies to several animation styles.
2D Animation
2D animation uses flat illustrated assets.
The workflow usually includes script, storyboard, style development, illustration, rigging or frame-by-frame work, animation, sound, and post-production.
This is one of the most common approaches for explainer videos because the style can adapt easily to characters, products, interfaces, and abstract concepts.
Motion Graphics
Motion graphics focuses on animated text, shapes, icons, charts, and graphic elements.
The production may require less character development, but timing, transitions, layout, and information hierarchy become especially important.
Stop Motion
Stop motion uses physical objects that are moved slightly and photographed frame by frame.
The planning stages remain similar, but production happens in front of a real camera rather than inside a fully digital animation environment.
Because each change must be captured physically, stop motion can require a large amount of setup and shooting time.
3D Animation
3D animation adds modeling, materials, lighting, rigging, and rendering to the workflow.
A 3D object is built from a digital mesh rather than a flat illustration.
This makes 3D useful for products, environments, technical systems, and scenes where depth or realistic camera movement matters.
It also tends to require more production time and computing resources than a typical 2D project.
How Our Animation Production Workflow Works
Our production workflow follows the same 10 animation steps described above, but the exact sequence can change slightly depending on the project.
A product demo may require interface captures and product-specific art direction. A training series may need reusable templates and a larger approval structure. A commercial may spend more time on visual development and sound.
What matters is keeping the approvals in the right order.
We try to settle the message before storyboarding, settle the storyboard before final illustration, and settle the visual assets before animation. That sequence reduces the amount of finished work that needs to be rebuilt after feedback.
For a broader look at how we handle projects, you can also see our explainer video production process.
Here is our current reel with examples of finished work produced through that workflow:
Frequently Asked Questions About the Animation Process
What are the main steps of animation?
A professional animation process usually includes research, scriptwriting, storyboarding, art direction, voiceover, illustration, animation, sound design, integration, and final delivery.
Studios may combine some steps, but those 10 phases cover most of the work involved in custom animated video production.
What are the main stages of animation?
The animation process can be grouped into three broad stages: pre-production, production, and post-production.
Pre-production covers planning, script, storyboard, and visual development. Production covers asset creation and animation. Post-production combines sound, editing, rendering, and final delivery.
How do you make an animation step by step?
Start by defining the message and audience. Write the script, create a storyboard, choose the visual style, record the voiceover, illustrate the assets, animate the scenes, add sound, integrate the final elements, and export the finished video.
That sequence gives you a practical animation process step by step.
How long does it take to animate one minute of video?
The answer depends heavily on style and complexity.
For custom 2D work, the animation stage alone can take roughly a couple of weeks, while the complete production process takes longer because it also includes scriptwriting, storyboard, design, illustration, sound, revisions, and delivery.
How long does the complete animation production process take?
A professional custom animated video commonly takes several weeks from kickoff to final delivery.
At Yum Yum Videos, a standard project usually takes around six to eight weeks, depending on complexity and the timing of feedback.
Is the animation process flexible?
Yes, but changes become more expensive as the project advances.
It is relatively easy to revise a script or storyboard. Changing a fully illustrated or animated scene usually requires more production time.
That is one reason professional animation workflows use approvals between stages.
Before You Start Animating
If you are planning an animated video, the first useful step is not choosing software or drawing characters. It is defining the message, audience, and objective.
Once those are clear, the rest of the animation steps have something concrete to build on.
The sequence matters because every stage creates the foundation for the next one. A strong script makes storyboarding easier. A clear storyboard makes illustration easier. Approved artwork makes animation more efficient.
That is the practical purpose of the animation process: make the important decisions early enough that the production team can spend its time creating the final video instead of rebuilding it.

Victor Blasco
Co-founder of Yum Yum Videos | Explainer Video & Video Marketing Expert
Victor Blasco has over 25 years of experience in animation and film production. For the past 14+ years, he has worked with companies to create explainer and marketing videos that simplify complex ideas and drive business results.
His work has supported global brands like Amazon and McKesson, as well as startups that raised over $2B and reached unicorn or IPO stages.
Victor shares insights based on real client work. His contributions have been published on platforms like Social Media Examiner, and he has been featured or quoted in outlets such as Forbes.