The 8 Steps of the Animated Explainer Video Process (Full Guide 2026)

Co-founder of Yum Yum Videos | Explainer Video & Video Marketing Expert
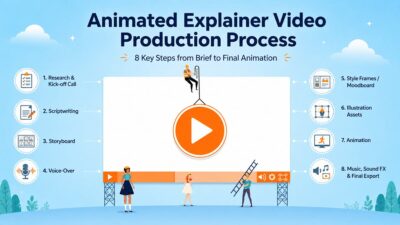
The explainer video production process is the step-by-step workflow used to create an explainer video, from the initial brief and script to storyboard, visual development, illustration, animation, sound, and final delivery.
I have spent more than 14 years producing explainer videos at Yum Yum Videos, an explainer video agency focused on custom animation, and before that I worked on animated series, TV pilots, and commercials. Those projects taught me something useful: an explainer may use many of the same production skills as other types of animation, but the way the work is organized is different.
Our current explainer video production process has eight client-facing stages. A typical custom animated explainer takes around 6 to 8 weeks, including review time. Rush projects can sometimes be completed in roughly 3 to 4 weeks, but only when the scope and feedback schedule make that realistic.
The eight stages are:
- Research and kick-off
- Scriptwriting
- Storyboard
- Voice-over recording
- Moodboard and style frames
- Illustration
- Animation
- Music and sound design
There is more happening internally, from file preparation to small corrections between departments, but these are the stages clients actually review and approve.
Table of Contents
Explainer Video Production Process Timeline
For a typical 60 to 90-second custom animated explainer, this is the working timeline we use as a reference.
| Step | Production stage | Typical working time |
|---|---|---|
| 1 | Research and kick-off | 1 day |
| 2 | Scriptwriting | 2 to 3 days |
| 3 | Storyboard | About 1 week |
| 4 | Voice-over recording | About 1 day |
| 5 | Moodboard and style frames | 2 to 3 days, often parallel with storyboard |
| 6 | Illustration | About 1 week |
| 7 | Animation | About 1 week |
| 8 | Music and sound design | 1 to 2 days |
Those are production times, not the entire calendar. Client review adds time between stages. In our projects, a client usually needs around 1 to 2 days to review each major delivery, which can add a week or more to the schedule even when production itself stays on track.
Some phases also overlap. Voice-over can be recorded while the storyboard is moving forward, and visual development can begin before every storyboard detail is finalized.
That is why simply adding the numbers in the table gives a misleading estimate. The full explainer video production process usually takes longer than the hands-on production time alone.
Why the Explainer Video Process Is Different From a General Animation Process
I have worked on animated series, TV pilots, commercials, and explainer videos. The production tools overlap, but the priorities do not.
A traditional animation production process may put more weight on character acting, dialogue, camera continuity, scene geography, and performance. An explainer video is usually organized around a business message, a voice-over, and a client approval process.
That changes several things.
The Documents Have to Work for the Client
A storyboard for an animation crew can contain technical shorthand because the people reading it already understand the production language.
An explainer storyboard has a second job. A marketing director, founder, product lead, or CEO needs to understand what will happen before the animation starts.
We deliberately simplify our boards for that reason.
The Voice-Over Often Controls the Timing
In many animated series and commercials, dialogue and character action interact more freely.
In an explainer video, the narration often controls the pace. The animator has to make the visual idea land during the exact window created by the voice-over.
The Message Has More Weight Than Visual Continuity
Explainer videos can jump between characters, diagrams, UI, typography, and abstract motion without needing the same continuity rules as a narrative film.
That flexibility is useful, but it also means the team has to stay focused on the core message. A beautiful animation can still be a weak explainer if the audience finishes the video without understanding the product.
Step 1: Research and Kick-Off
The first stage of the explainer video production process is research.
Before the kick-off call, we ask the client to complete a creative brief. It covers the product, audience, competitors, goals, existing messaging, brand material, references, and where the final video will be used.
Then we hold a kick-off call with the client, producer, scriptwriter, and art director.
I consider that call part of custom production, not an optional extra. A team cannot make good decisions about the script or visual direction if it does not understand the company first.
We usually try to settle questions such as:
- Who is the video for?
- What does that audience already know?
- Which problem should the opening focus on?
- What is the product’s main value?
- Which features belong in the video?
- Which details should stay out?
- What should the viewer do after watching?
- Where will the video be used?
One pattern I have seen hundreds of times is that clients know too much about their own product.
That sounds like an advantage, but during a short explainer it can become a problem. A founder may want to include every feature, integration, audience, and differentiator because all of them matter internally.
The scriptwriter has to decide what matters to a first-time viewer.
Typical working time: 1 day.
What I Look for in a Kick-Off Call
If a production company starts writing before asking detailed questions about the audience and product, I would want to know why.
A custom explainer should not begin from a generic script structure with the company name swapped in later. The first conversation should give the team enough information to make decisions that are specific to that client.
If you’re comparing providers, our guide on how to choose an explainer video company explains what to look for in the team’s process, portfolio, pricing, and industry experience.
Step 2: Scriptwriting
The script gives the video its structure before anyone starts designing the final scenes.
For many projects, we use a simple progression:
Problem → Solution → How it works → Benefit → Call to action
It is a working framework, not a rule.
A product demo may show the interface almost immediately. A healthcare video may need more context before introducing the product. A brand piece may use a character story instead of a direct problem-and-solution sequence.
For a deeper breakdown of this stage, our explainer video script guide covers templates, word counts, and real examples.
Our Working Rule for Script Length
We use roughly 140 spoken English words per minute as a conservative planning rule (our explainer video length guide explains how script length, pacing, and complexity affect the final runtime)
A 60-second explainer therefore starts around 140 words. A 90-second video usually lands near 210 words before we account for pauses, product names, numbers, and technical language.
The final number depends on the voice and subject, so we always read the script aloud and time it.
One of the easiest ways to damage an otherwise good video is to force a voice actor to race through a script that should have been shorter.
Typical working time: 2 to 3 days for a 60 to 90-second script.
Where AI Fits in Our Scriptwriting Today
We test AI tools in production, including scriptwriting.
They are useful for organizing information, testing alternate phrasings, or getting past a blank page. I would not hand an unedited AI script directly to a client or voice actor.
The problem is not whether the copy is grammatically correct. The script has to sound like the company, understand the audience, and make decisions about what information deserves screen time.
That still requires someone who knows the project.
Step 3: Storyboard
The explainer video storyboard turns the approved script into a visual sequence.
Our storyboards are intentionally easy for clients to read. We usually work with around nine frames per page, with the corresponding voice-over and director notes placed below each frame.
The goal is simple: the client should be able to look at the board and understand what will happen on screen.
We avoid filling it with technical production language unless that information is needed for approval.
With this Amazon project, the relationship between storyboard and finished animation is easy to see:
A Storyboard Mistake I See Often
Too much narration gets assigned to one visual frame.
On paper, the storyboard can look perfectly reasonable. Once the voice-over is timed, that frame may need to stay on screen for ten or fifteen seconds.
Then the finished video feels slow.
The storyboard is the right place to catch that problem. We can shorten the copy, split the scene, or add another visual beat before final illustration and animation make the change more expensive.
Typical working time: about 1 week for a 60-second storyboard.
Step 4: Voice-Over Recording
We often record the voice-over while storyboard work is still moving forward.
About 90% of our clients are in the United States, so US English is our most common request. We also regularly work with British English and other markets, and we have produced versions for countries and regions including the Philippines, Korea, and Qatar.
One project required versions in nine different languages.
That experience changed the way we handle localization.
The Arabic Translation Lesson
We once translated a project into Arabic and learned quickly that translation is not just a matter of replacing the English words.
The spoken Arabic version took considerably longer.
A video that had been timed around an English voice-over suddenly approached two minutes once the translated narration was recorded.
Since then, we check translated scripts against the available screen time before the final voice is recorded. The language has to fit the edit, or the edit has to change.
Human and AI Voice-Over
For client-facing custom work, I still prefer a professional voice actor.
AI voices have improved, and there are situations where they can make sense, especially for testing, internal drafts, or very limited budgets. For the final narration of a major marketing video, I still want the control over performance, emphasis, cadence, and direction that comes from working with a voice actor.
Typical working time: about 1 day per approved language and voice.
Step 5: Moodboard and Style Frames
The storyboard explains what happens. Visual development shows what the finished video will look like.
Our art director begins with a moodboard. It can include illustration references, color ideas, typography, character styles, textures, composition, and other visual material.
Once the direction is approved, we usually create three style frames.
Those frames are close to final quality. The client can see the characters, backgrounds, props, palette, and overall design before the team illustrates every scene.
Here is an example from our work with Accelerant:
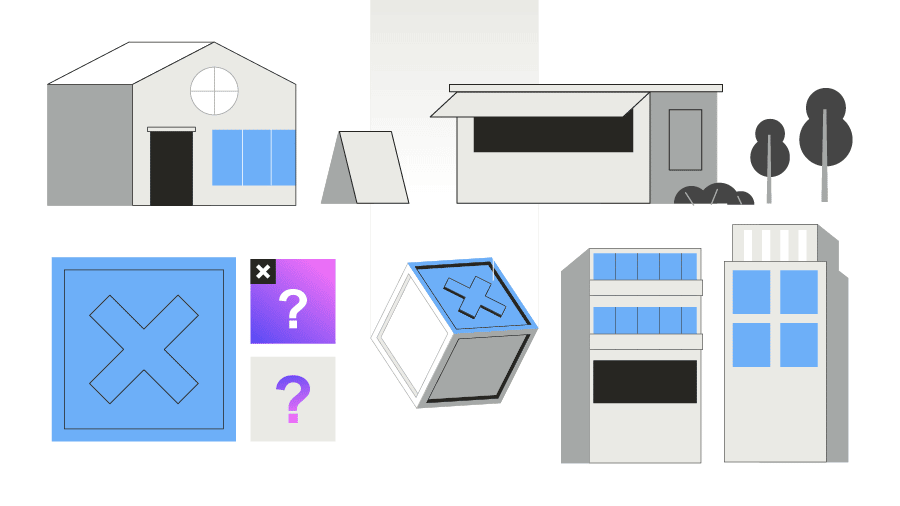
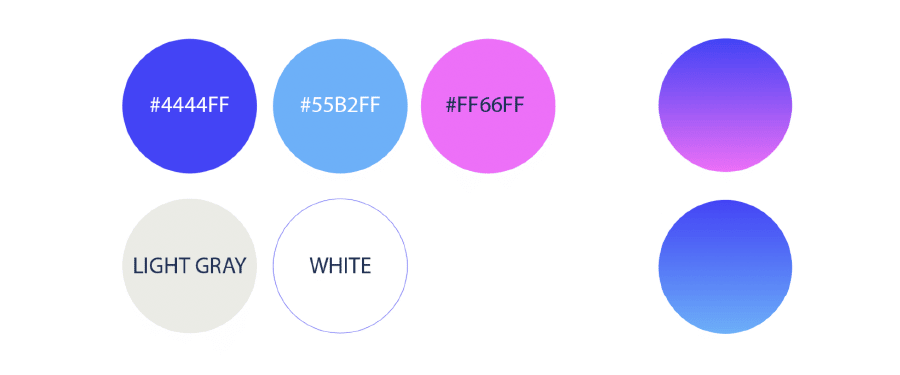
The visual approach should also be chosen around the communication problem. Our guide to the types of explainer videos compares 2D animation, motion graphics, whiteboard, mixed media, and other approaches.
The Accelerant project eventually grew into a series of nine explainer videos produced between 2021 and 2024, so establishing a visual language that could work across multiple pieces mattered from the start. In 2025, after our production period, Accelerant made its NYSE debut, with Reuters reporting a fully diluted valuation of about $6.4 billion when trading began. For this article, the production lesson is consistency: one visual system had to support several videos, audiences, and messages over multiple years.
You can see the broader project in the Accelerant case study.
Why I Do Not Rush This Approval
A character change during style development may affect three frames.
The same change after the full illustration stage may affect dozens of assets. Once animation has started, those assets may already be rigged and moving.
In our experience, a major late change can add around 20% to the budget and timeline because several stages have to be repeated.
That is why we do not move forward simply because a style frame is “close enough.”
Typical working time: 2 to 3 days, often in parallel with the storyboard.
Step 6: Illustration
After the storyboard and visual direction are approved, the illustration team creates the final assets.
For our 2D explainer videos, the team usually works in vector formats and prepares characters, props, backgrounds, icons, interfaces, and other elements for animation.
This stage includes work that a client may never notice in the final image.
A character arm that needs to bend cannot stay as one flat object. The shoulder, upper arm, forearm, and hand may need separate layers. Faces, hair, props, and background elements may also need to be separated depending on how they will move.
Why Layering Matters
If a team tries to animate a flat illustration without preparing the pieces correctly, the animator has much less control.
Movement becomes harder to build naturally, revisions take longer, and the result can look stiff.
The illustration may look identical before and after file preparation, but the animator sees a completely different asset.
Where AI Fits in Illustration
Our artists use new tools when they help the process.
AI can be useful for testing visual directions, generating rough references, or exploring variations quickly. For final custom client assets, we still want the artwork built and controlled by an artist so the characters, brand details, and scene assets remain consistent from shot to shot.
Typical working time: about 1 week for a 60-second 2D explainer.
Step 7: Animation
Animation is where all the approved material starts moving.
The animator works from the storyboard, illustration files, voice-over, and timing. Depending on the project, the work may include character animation, motion graphics, typography, UI animation, transitions, camera movement, and effects.
Here is part of the animation process from the Accelerant project:
What I Check When Reviewing Animation
I look at the characters first.
Do the small movements feel natural? Does a background character freeze for too long? Does the protagonist hold the same exaggerated expression through an entire shot? Is there movement everywhere even though the viewer only needs to watch one thing?
More animation is not automatically better.
The movement has to guide attention.
When several objects compete for the viewer’s eye, the message becomes harder to follow even if every individual piece of animation is technically good.
Where AI Animation Fits Today
We keep testing AI animation tools because the field moves quickly.
For precise custom character work, our main concern is still control and consistency. A client may approve a specific character design, expression language, and brand style. The animation stage has to preserve those decisions across every shot.
We use tools when they give the team more control or speed. We do not use them simply because a result can be generated faster.
Rendering
Once the scenes are ready, the project has to be rendered.
The illustrations, animation, transitions, effects, timing, and other assets are processed into the video files used for review and final delivery.
Typical working time: about 1 week for a 60-second 2D explainer.
Step 8: Music and Sound Design
Music and sound design come near the end of the explainer video production process.
We usually present a few music options and then add sound effects where they help the action.
The important part is balance.
An explainer video is not a trailer. If the music is so loud that the viewer has to work to hear the narration, the mix is working against the purpose of the video.
That sounds obvious, but it is a mistake I still hear in finished marketing videos.
Imagine an investor or potential client watching the piece for the first time. The voice-over contains the information you want them to understand. The soundtrack should support that information.
AI Music
AI music can work in some situations, but music licensing is already relatively inexpensive compared with the rest of a custom production.
For our projects, I usually prefer choosing a strong licensed track or working with human-created music rather than spending production time trying to save money on one of the smaller line items.
Typical working time: 1 to 2 days.
Where Client Feedback Fits Into the Explainer Video Production Process
Client feedback is not a ninth stage. It happens throughout the project.
A client may review:
- Script
- Storyboard
- Moodboard and style frames
- Final illustrations
- Animation
- Music and final mix
We provide several opportunities for revisions because the safest time to change an idea is before the next department builds on it.
If the message changes during scriptwriting, the writer can revise the copy.
If the same change happens after illustration, the storyboard and artwork may also need to change.
If it happens after animation, the team may need to redo complete scenes.
That is why a few extra hours spent reviewing an early stage can save days later.
In a normal project, client reviews alone can add at least eight days to the calendar when each major delivery takes one or two days to approve. That time should be included when planning a launch date.
Three Things I Tell Clients Before We Start
I would keep these three points even in a shorter version of this article because they come directly from problems we have seen during real projects.
1. Cheap Can Become Expensive
An explainer video may sit on a homepage, appear in sales meetings, support investor presentations, run in paid campaigns, or be reused for years.
The cost of the video is only one part of that equation. Our explainer video cost guide covers the pricing side in more detail.
MedVector is a good example from our own work. Between 2018 and 2021, the company worked with us on three whiteboard explainer videos while presenting a complex clinical-trials model to investors, physicians, and partners.
During that period, MedVector secured $3.5 million in funding while using video as a primary communication asset on a focused landing page. Our role was to help the company explain a regulated healthcare model clearly enough for different audiences to understand the opportunity.
That is why I would not choose production quality only by asking which quote is cheapest. You can see the full context in our MedVector case study.
2. Spend More Time Early to Save Time Later
The script and storyboard are cheap places to change your mind.
Animation is not.
A late structural change can affect the script, storyboard, illustrations, voice-over timing, rigging, and complete animated scenes.
We rarely see major surprises when clients review each stage carefully because our process does not move forward without approval. When a client does reverse an important decision late in production, the extra work can add roughly 20% to the budget and schedule.
Taking another day to review a storyboard is usually cheaper than rebuilding a scene three weeks later.
3. Not Everything Belongs in the Script
One of the hardest parts of a good explainer is deciding what to leave out.
A company may have twenty features. The viewer may only need three of them to understand why the product matters.
Trying to include every feature usually creates one of two problems: the video becomes too long, or the voice-over becomes too fast.
Neither is a good solution.
For most marketing explainers, we prefer to keep the main video under two minutes, and around 90 seconds is often a practical target. There are exceptions, especially for technical, educational, or regulated topics.
If the product genuinely needs more explanation, a series of shorter videos can work better than forcing everything into one piece.
Frequently Asked Questions About the Explainer Video Production Process
What is the explainer video production process?
The explainer video production process is the workflow used to create an explainer video from the initial brief through scriptwriting, storyboard, voice-over, visual development, illustration, animation, sound, and final delivery.
What are the eight stages of an explainer video process?
Our client-facing process uses eight main stages: research and kick-off, scriptwriting, storyboard, voice-over recording, moodboard and style frames, illustration, animation, and music and sound design.
How long does the explainer video production process take?
Our standard custom process usually takes around 6 to 8 weeks, including review time. Rush productions can sometimes be completed in approximately 3 to 4 weeks when the scope is controlled and feedback arrives quickly.
How long does each review take?
We normally allow around 1 to 2 days of client review time after a major production stage. Across a complete project, those approvals can add at least a week to the calendar.
Can stages overlap?
Yes. We often record voice-over while storyboard work continues, and visual development can run in parallel with parts of pre-production. Final illustration and animation should wait until the relevant earlier decisions are approved.
When is the cheapest time to make a change?
During the script, storyboard, and visual-development stages. The later a structural change appears, the more completed work may need to be redone.
Is the explainer video process the same as the animation process?
No. They share many production skills, but an explainer is usually organized around a business message, voice-over, client approvals, and a defined audience. A broader animation process may place more emphasis on dialogue, acting, continuity, cinematography, or entertainment.
Before the Project Starts
After working on more than 1,000 animated videos, the production problems that cost the most time are rarely mysterious.
The message was not settled. Too much went into the script. Someone approved a visual direction they were unsure about. Feedback arrived late. A localization issue was discovered after the English timing had already been locked.
Those problems are easier to fix at the beginning than at the end.
Before the first script draft, make sure the team agrees on the audience, the main message, where the video will be used, and who has final approval.
That is where a smoother explainer video production process usually begins.

Victor Blasco
Co-founder of Yum Yum Videos | Explainer Video & Video Marketing Expert
Victor Blasco has over 25 years of experience in animation and film production. For the past 14+ years, he has worked with companies to create explainer and marketing videos that simplify complex ideas and drive business results.
His work has supported global brands like Amazon and McKesson, as well as startups that raised over $2B and reached unicorn or IPO stages.
Victor shares insights based on real client work. His contributions have been published on platforms like Social Media Examiner, and he has been featured or quoted in outlets such as Forbes.